› Forums › Fan Stuff › Convention Stuff › Newest Tenchi-ken
- This topic is empty.
- Post
-
- December 15, 2011 at 6:00 AM
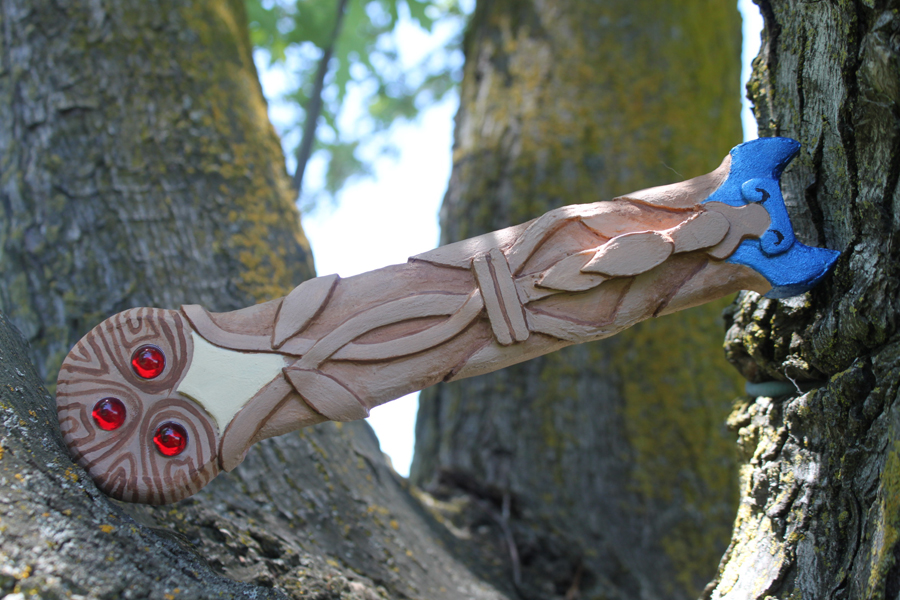
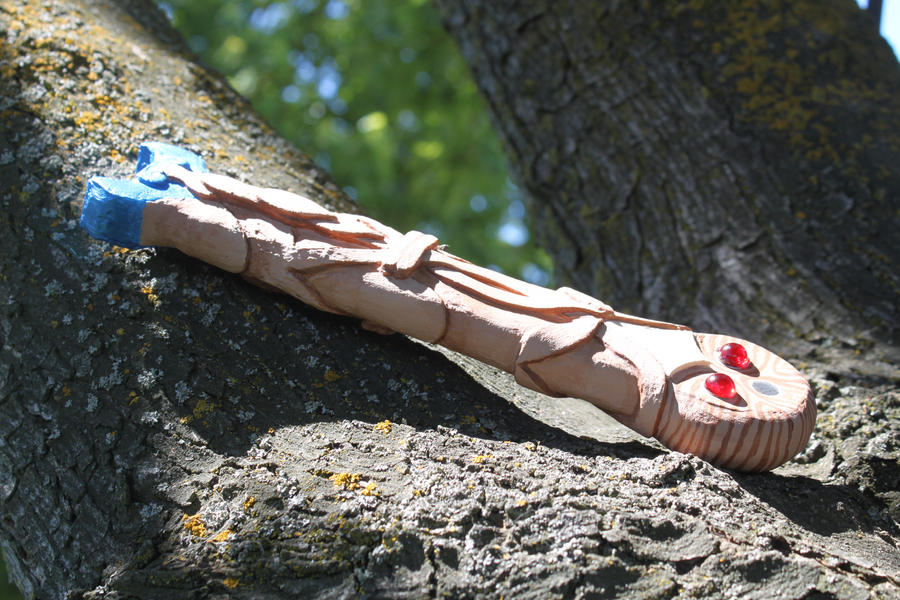
The Master Key I made. One side has all three gems, the other is missing one gem, just in case I need to pose with Ryoko and keep continuity up. 
http://fc09.deviantart.net/fs70/f/2011/168/5/9/tenchi_ken_by_tearatone-d3j604g.jpg " /> 
http://fc08.deviantart.net/fs71/i/2011/348/5/e/master_key_by_tearatone-d4j58gm.jpg " />
- Replies
-
-
- December 16, 2011 at 7:48 AM
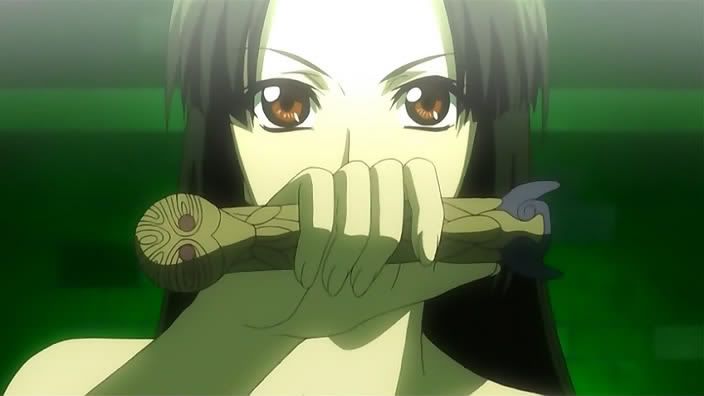
First I do research and gather reference shots. There is a lot of inconsistency regarding the Master Key, so I have to find what is always present then pick my favorite “optional” design aspects. Next I sketch like a mad man, drawing the object from all angles, familiarizing myself thoroughly with the design.
Then I make a 100% to scale draft on a single sheet of paper, incorporating all details. From there I cut it out then trace the outline on a thin layering type of material (cardboard, wood, foam, w/e, its just to take up girth and create dimension.) Knowing to make the middle layer with the most circumference, and each proceeding layer with slightly less girth. This ensures that the final product will have a curved edge. After that I determine which parts of the draft will be raised and cut out the parts that I don’t need anymore. Trace, cut out, place, remove from draft, and so on and so on.
Once everything is assembled I hot glue it all together. Then I cover the entire piece with paper clay (clay made from paper!) About 1/4 to 1/2 inch all around, let it dry, redraw the design onto the prop, then take a dremel to the clay and make a relief carving, making sure to add in a wood like texture.
Then I super glue resin gems onto the hilt, texture paint, and done!
-
- December 16, 2011 at 9:52 AM
There actually was an official tenchi-ken hilt that was sold in Japan. Came in a box, with logos, and all that jazz, I “think” it was resin, can’t recall if it was painted or not but it was hilt size
so it’d have been holdable. Something like $30 or $40.
Only saw it once at one of the major stores… neat little thing though.
-
- December 16, 2011 at 10:51 PM
^Are you sure it was a hilt? 
http://i17.photobucket.com/albums/b84/harleybmw/anatadakekonban-wtf.jpg " /> :Cheeks:
-
- December 17, 2011 at 1:21 AM
^I wouldn’t be surprised if you’ve actually seen it, and it is indeed official. Are you sure it isn’t sold anywhere online? -
- December 30, 2011 at 7:00 AM
Dude that is AWESOME! It looks great, proportions look accurate, painstakingly detailed… & nice touch with the three/two gems on either side. The editor in my head is screaming ‘yay! maintaining continuity!’ The fact that you made it yourself just doubles the awesome factor.
-
- September 6, 2012 at 3:44 AM
That is impessive. Wish i had one. -
- September 6, 2012 at 10:23 AM
You got to admit though, that’s a pretty good start for the tenchi ken. -
- August 19, 2013 at 11:44 PM
Here is my third pass at making this iconic Tenchi Muyo! item. :Tenchismile:

http://img.photobucket.com/albums/v443/Tearatone/the_master_key_by_tearatone-d6bb1fe_zps2b72c17c.png " /> And if you would be interested in purchasing one, you can find it (ad other cool anime and videogame props) listed here:
http://www.etsy.com/shop/ThePropsShop?ref=l2-shop-info-avatar ” class=”bbcode_url”> http://www.etsy.com/shop/ThePropsShop?ref=l2-shop-info-avatar -
- August 20, 2013 at 3:50 AM
I like this one a lot Tearatone! The wood looks a lot more intricately carved this time around. The world of Tenchi-kens is getting bigger these days, but I do enjoy seeing you hone your technique and continue to use actual wood. I wish you the best of luck with your sales, unfortunately I cannot be a customer as I once again find myself drawn into the expensive world of higher education. -
- August 21, 2013 at 12:45 AM
Here you go… Current pics:
http://i32.photobucket.com/albums/d1/GuardianZinv/20130820_201736.jpg http://i32.photobucket.com/albums/d1/GuardianZinv/2013-01-17103752.jpg http://i32.photobucket.com/albums/d1/GuardianZinv/20130820_201834.jpg http://i32.photobucket.com/albums/d1/GuardianZinv/20130820_201823.jpg http://i32.photobucket.com/albums/d1/GuardianZinv/20130820_201756.jpg Some in development pics:
http://i32.photobucket.com/albums/d1/GuardianZinv/2012-12-15212000_zpsec3a13ad.jpg http://i32.photobucket.com/albums/d1/GuardianZinv/2012-12-24170439_zps06857769.jpg http://i32.photobucket.com/albums/d1/GuardianZinv/2012-12-25134649_zps5aaba80f.jpg Blade light test:
http://i32.photobucket.com/albums/d1/GuardianZinv/2012-12-01184818.jpg http://i32.photobucket.com/albums/d1/GuardianZinv/2012-12-01184829.jpg No that’s not an el cheapo lightsaber toy blade.
🙂 At con:
http://tenchiforum.com/v3.0/ohayocon2013/DSC00044.jpg 3D modeled from the line arts and multiple screen caps, printed a full scale one capable of holding electronics and a custom made blade mount. It is the correct scale all over. Also made a couple mini ones that are more Ayeka sized. I lost a mini tenchi-ken the first day of Ohayocon *tears*
Now for the bad news, the blade wiring broke the 1st night of Ohayocon. The sound board I ordered wouldn’t work at the last second so I had to work with what I had and totally rewire and solder everything, which was a disaster. I kid you not I was working 12 hour shifts, coming home and sanding into the whee hours every day. The electronics mess happened the weekend before the con. So the wiring job was weak, thus it broke. Tis why the first 1 or 2 segments of the blade isn’t lit in the at con picture.
But it got plenty of looks during the Tenchi panel, and the dealers were pretty fond of it.
If I ever have the heart to break it apart to fix the wiring, I might put the correct sound board back in.
I’d also like to get a wireless charging system added, and tweak the buttons (lit gems) to have more blade and sound modes.
So while it ultimately broke, it was a learning experience. If I ever make a Mk. II, you can be sure it’ll kick butt. But then again… I could always make Ryoko’s light sword instead.
🙂 -
- August 21, 2013 at 4:53 PM
Good on ya Tearatone! It looks incredible! Glad you stopped on by to show us! Same to you JG, too bad about the wiring, the whole thing is amazing! (& Ryoko’s blade? Heyo, that’d catch some people’s attention)
Did you do the stand as well? It’s a really nice bow on top of the whole package.
-
- August 22, 2013 at 2:26 AM
I redesigned the logo and made the whole name plate image, and sent that off to a guy that made basic acrylic stands.
Ryoko’s blade I’ve been thinking about, as the most difficult part is keeping it transparent so you
never see the electronics that make it light up. I think it’s achievable, but it’d probably take a couple
attempts to make it work right.
-
- You must be logged in to reply to this topic.

